Coursedog
Access
Supported Browsers
- Coursedog ensures full compatibility with the latest general availability release of the following browsers: Microsoft Edge, Mozilla Firefox, Google Chrome, and Apple Safari.
- Microsoft Internet Explorer 11 may be used to access Coursedog applications but will result in a subpar experience.
- We recommend Internet Explorer users switch to Microsoft Edge.
- Other browsers (including older versions of Internet Explorer) are not supported.
- Although users are able to access the app, we cannot ensure full compatibility for all in-app functionality for browser versions that are more than two years old.
Accessing Coursedog
To log into Production, go here.
Logging in
Single Sign On (SSO)
If your school uses Single Sign On (SSO), you will need to know your institutional login information. The good news is that you won't have to maintain another username and password!
Step 1: Enter your email address into the standard login page.

Step 2: You will then be redirected to your institution's login page, where you will input your username and password for your institution.

Logging Out
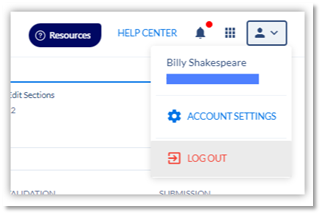
- To log out of Coursedog, click on the profile icon in the upper right-hand corner of your screen and select "Log Out".
- If you are inactive for more than 24 hours, you will automatically be logged out of Coursedog.
Logging in - Troublshooting
If you run into errors while logging in, please send an e-mail to coursedog.security@tcu.edu.
Curriculum
Creating Agendas
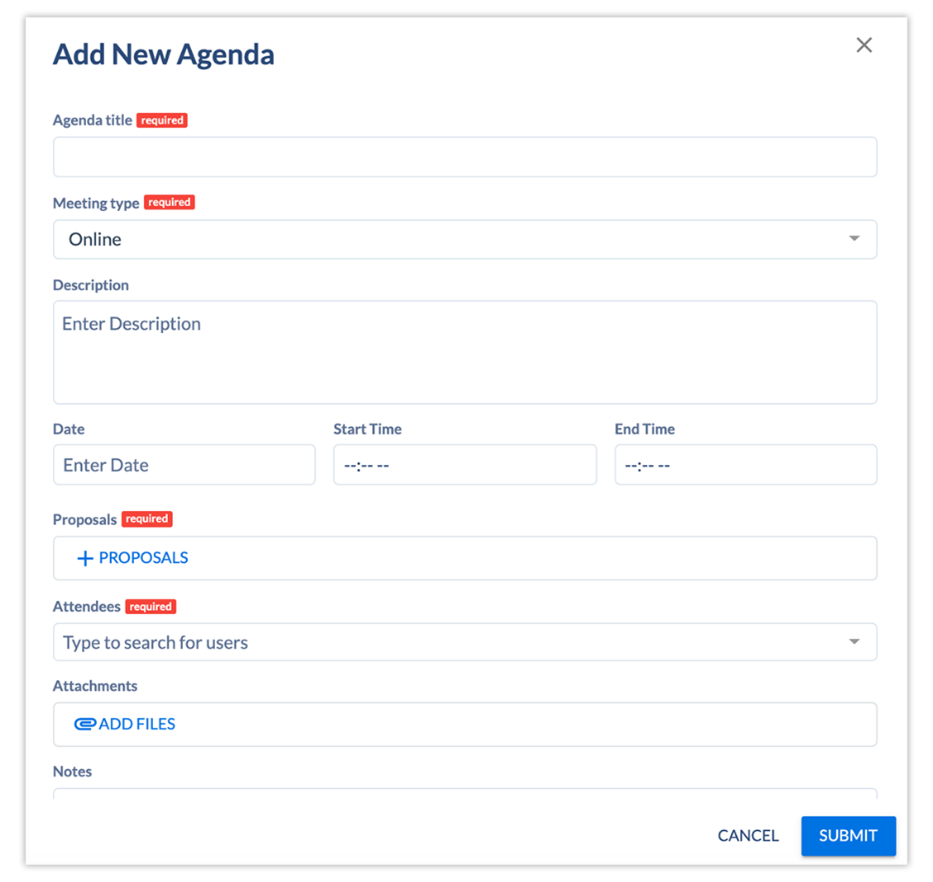
Step 1:
- Navigate to Curriculum > Settings > Committes > (Select Committee) > Agendas to create an agenda that is assigned to a select, pre-existing committee and your permissions allow.
- Navigate to Curriculum > Agendas to create an agenda f your role permissions don't include access to Curriculum > Settings.
Step 2:
- Click on the "+Add Agenda" button from the list view.

Step 3:
- Input basic meeting information.
- Required fields will be noted with a "required" flag.
Step 4:
Click "+Proposals" to search for the proposals that the committee should review during the meeting.
Step 5:
- Click on a proposal to add it to the agenda.
- You can select multiple proposals.
- Click "Close" when you are finished.
- If you aren't finding the proposals you need, click the "filter" option at the top of teh modal to help focus your search.

Step 6:
- Type into the "attendees" field to add invididuals attendees by name.
Step 7:
- To edit the email that potentially goes out to attendees when the agenda is aded and updated, click "edit email template".
- If you don't wish to send an email, you'll be able to opt out of that in a bit.
- Edit the email as desired and click "Save".
Step 8:
- Review your proposal details and, once confirmed, click "Submit".
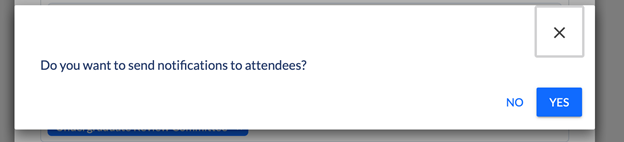
Step 9:
- Once you click "Submit", you'll be given the option to choose whether or not a notification emai is sent to attendees.
- Select "Yes" to send the notification.
Viewing, Editing & Deleting Agendas
Viewing All Agendas
Navigate to Curriculum > Agendas to view all upcoming Agendas at your institution.

Viewing Agenda Details
- Click into any agenda to view its details.
- It will include basic meeting information, attachments, attendees, and proposals.
- It will also include a room assignment if you're using Coursedog's Events or Academic Scheduling platforms.
- Click into the "Attachments" icon to view attachments.

Editing Agendas
1. Click 'Edit Agenda" to modify the agenda details, modify the proposal list, add attachments, or modify the attendee list.
2. Click "Save" when you are done.


Deleting Agendas
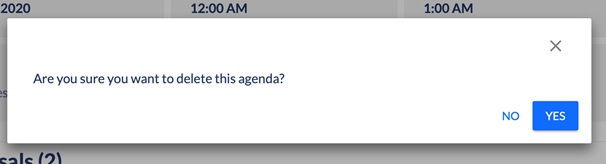
You can remove or delete an existing Agenda by clicking on the "Delete Agenda" button in the upper right-hand corner. You will be prompted to confirm before it is removed.

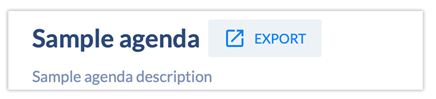
Exporting to a PDF
To export an agenda to a PDF:
- Navigate to Curriculum > Agendas.
- Open the Agenda you'd like to export.
- Click the "Export" button next to the agenda name.
Permission to Plan
1. Navigate to https://app.coursedog.com/#/cm/home
2. Click "New Proposal"

3. Click here.
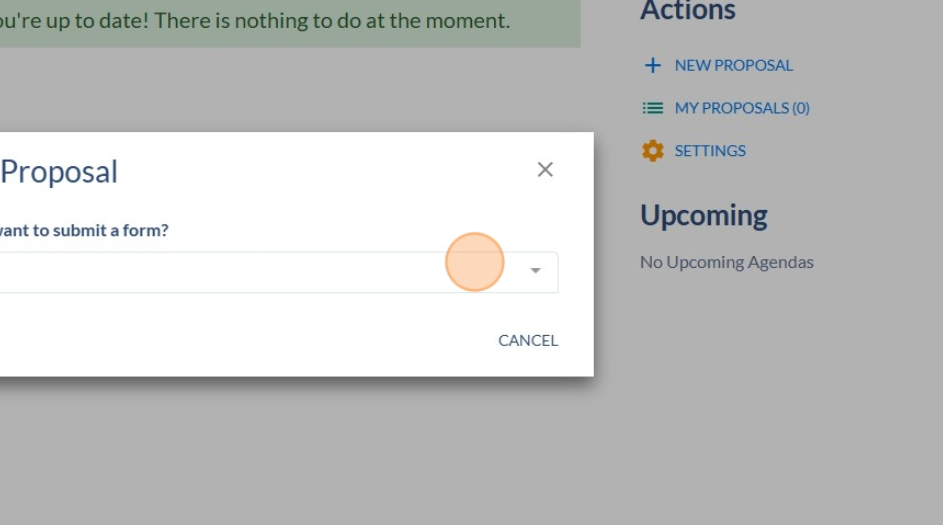
4. Click appropriate career level.
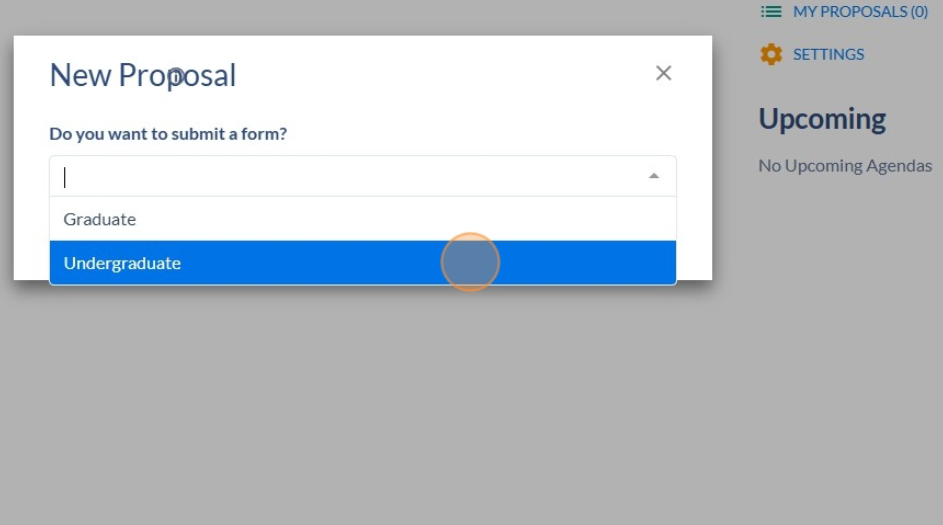
5. Click here.
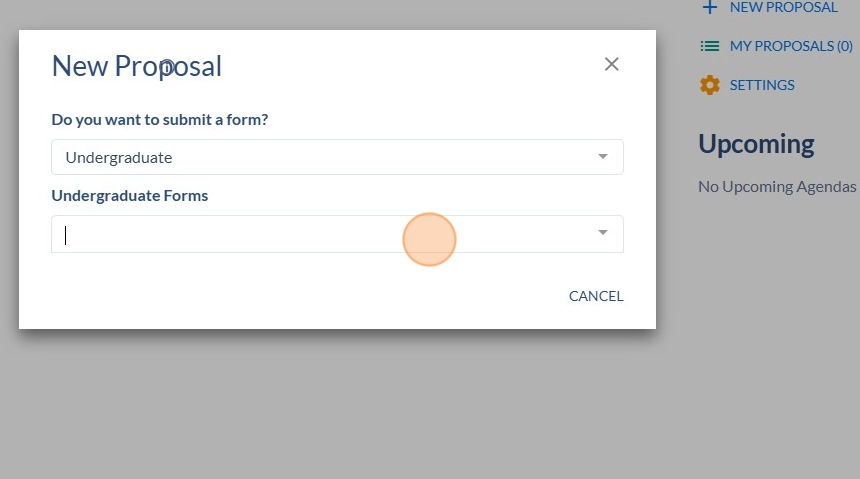
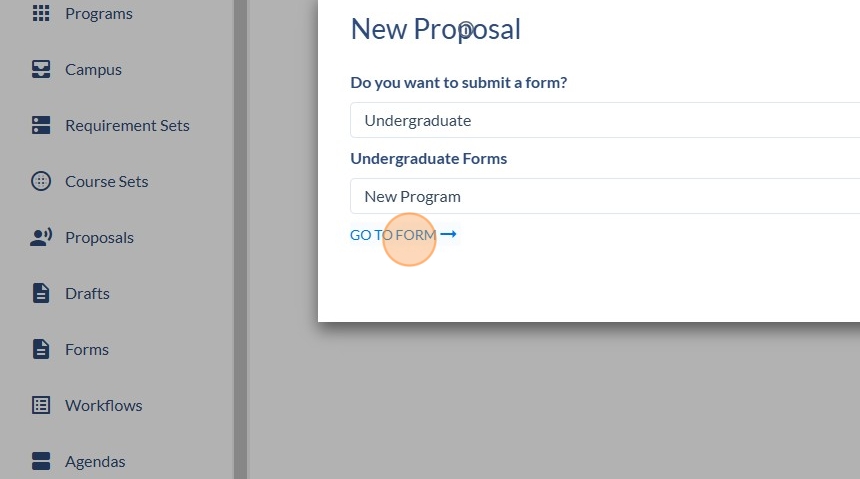
6. Click "Permission to Plan".
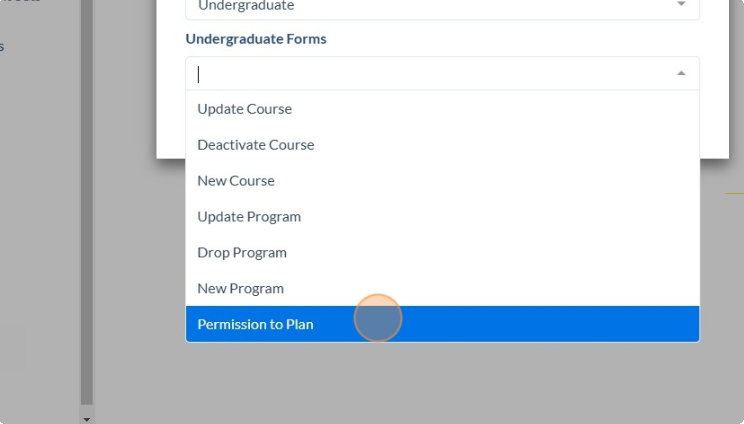
7. Click "Go To Form".

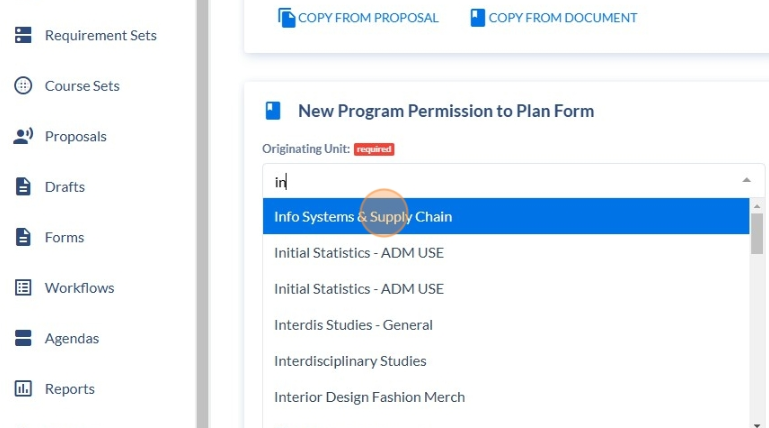
8. Click into "Originating Unit".

9. Enter the department.
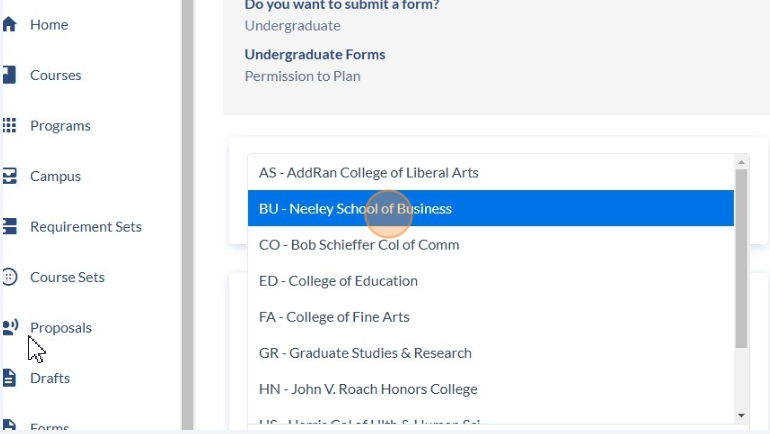
10. Click into "College".

11. Click on the appropriate college.
12. Click into "Type of Action:.
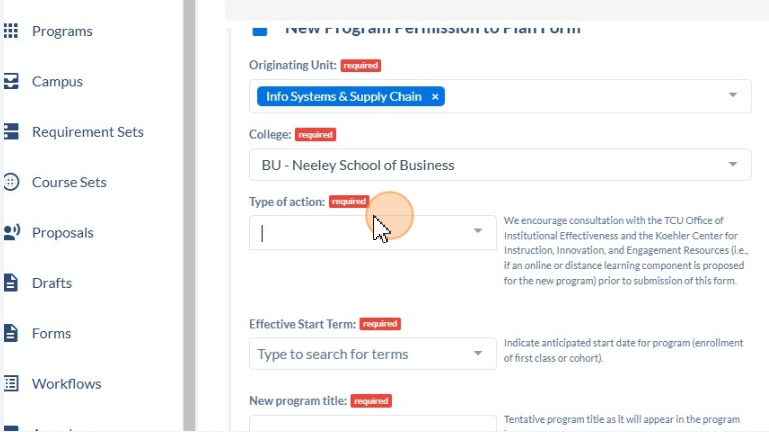
13. Click the appropriate type -most will be New Program.

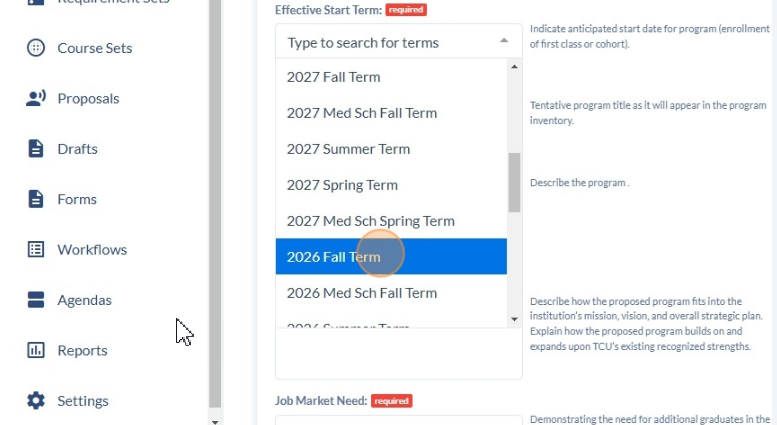
14. Click into "Effective Start Term".
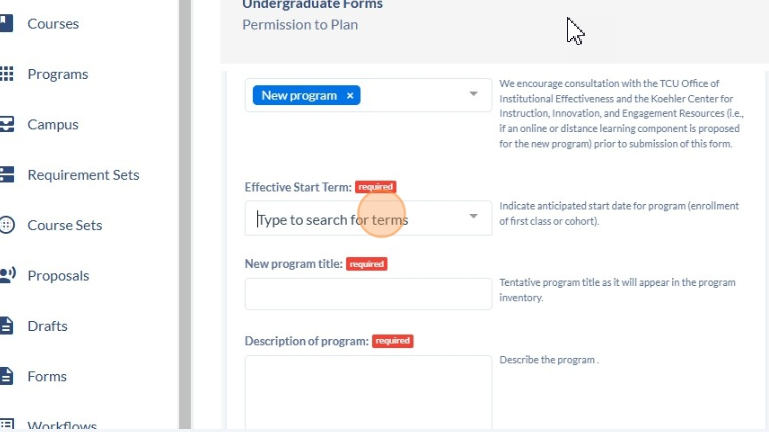
15. Click on appropriate term.
16. Click into the "New program title" field and enter the proposed program name.
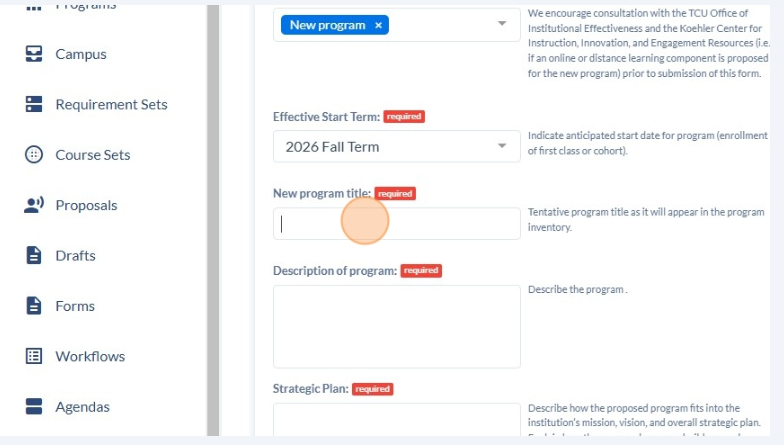
17. Click into the "Descripton of program" field and enter the program description.

18. Click into the "Strategic Plan" field and enter how the program ties in to the strategic plan.
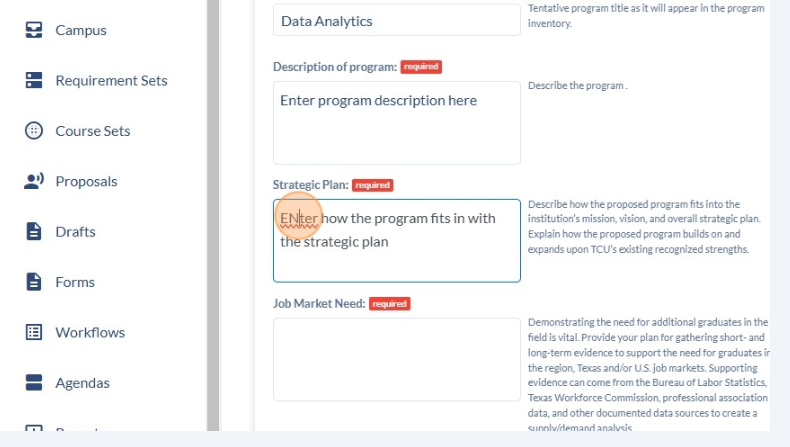
19. Click into the "Job Market Need" field and describe market demand for the program.
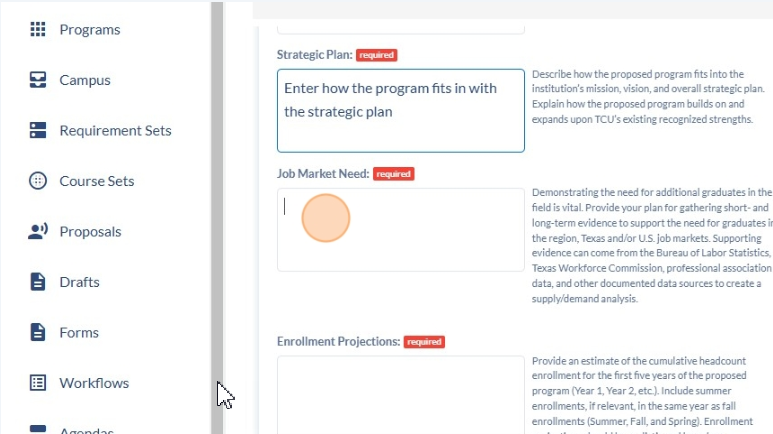
20. Click into the "Enrollment Projections" field and include enrollment projections for the program.

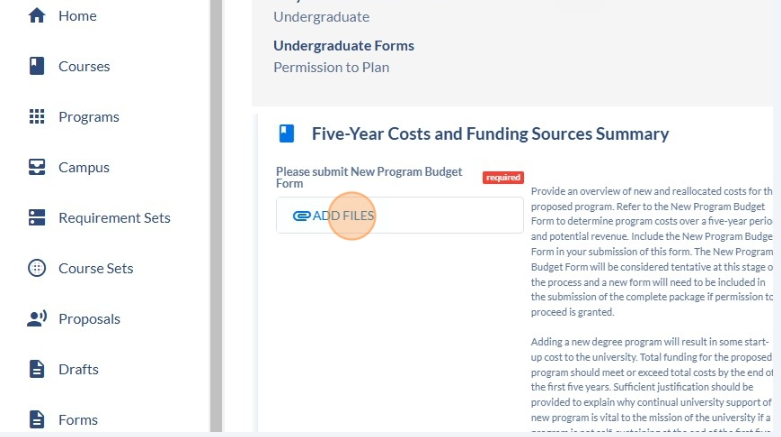
21. Upload your completed New Program Budget Form.
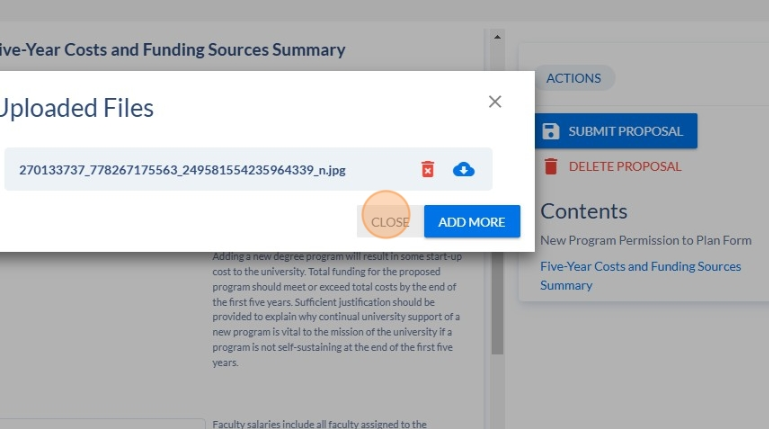
22. Click "Close"
23.
How To Create A New Program Proposal
1. Navigate to https://app.coursedog.com/#/cm/home
2. Click "New Proposal"
3. Click here.
4. Click appropriate career level
5. Click the needed form type
6. Click "New Program"

7. Click "Go To Form"
8. Complete all fields marked "Required". Click into "Originating Unit" and enter your department.
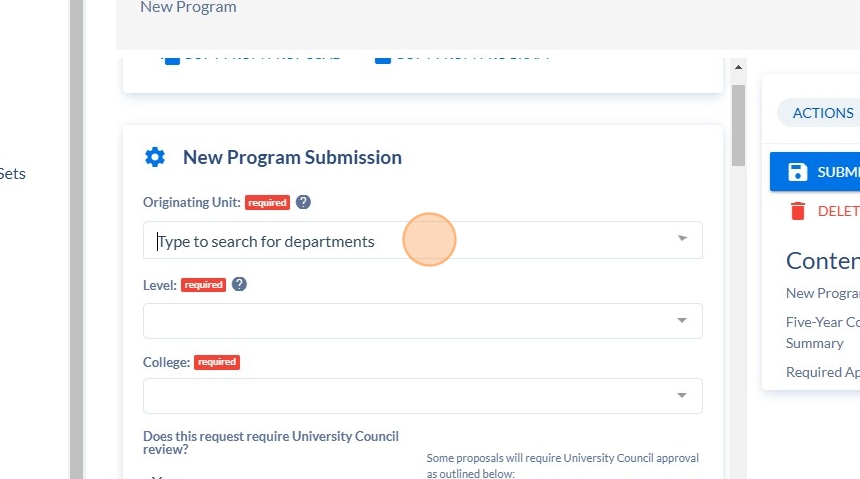
9. Click the appropriate department

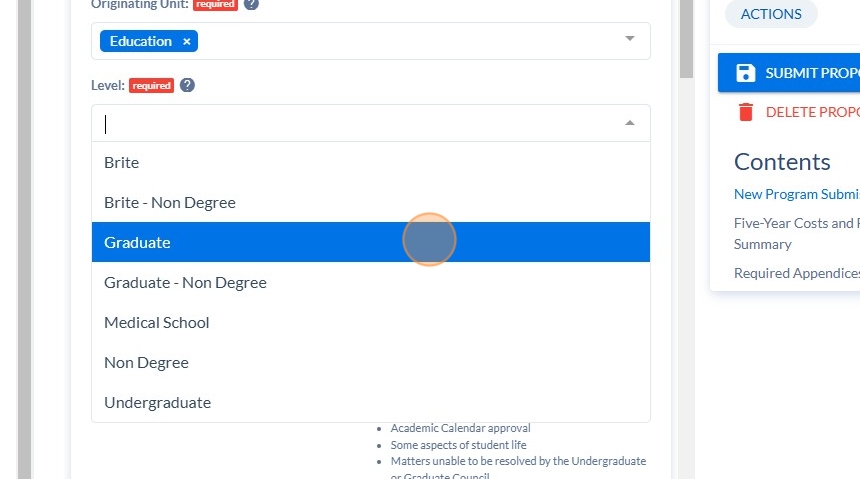
10. Click into level.

11. Click appropriate level.
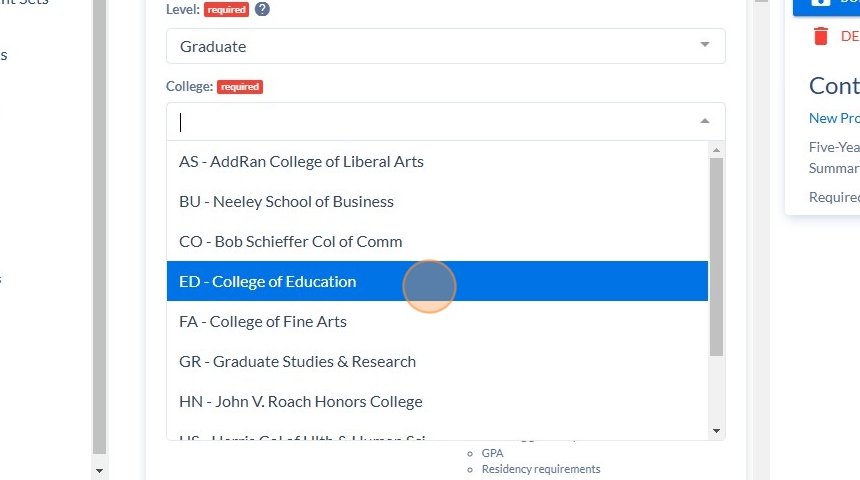
12. Click into College.
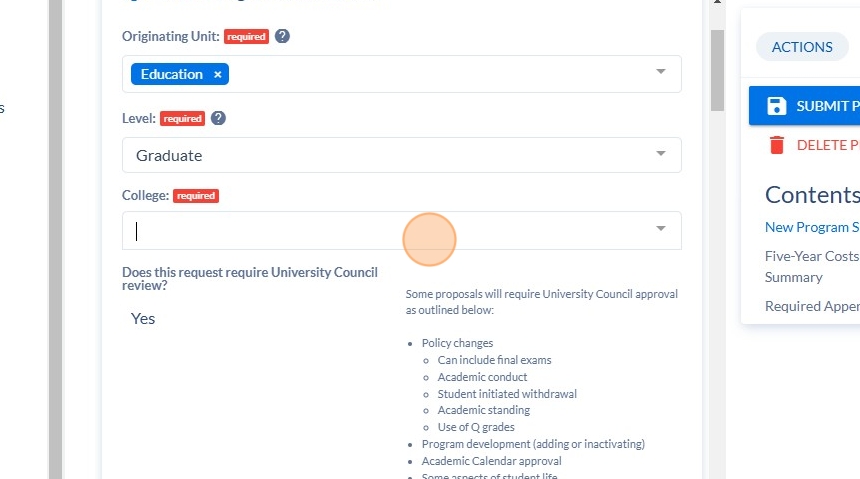
13. Click appropriate College
14. Click into the "Program Code" field and enter the approved code for the new program.

15. Click into the "Program Long Description/Plan Prospectus" field and enter the long description of the program.
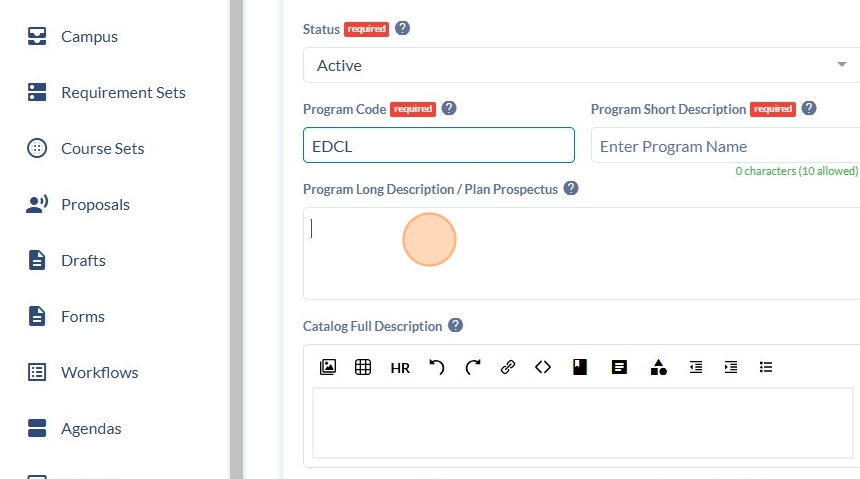
16. Click into the "Catalog Full Description" box and enter the catalog text. This can be the same as the long descripton.
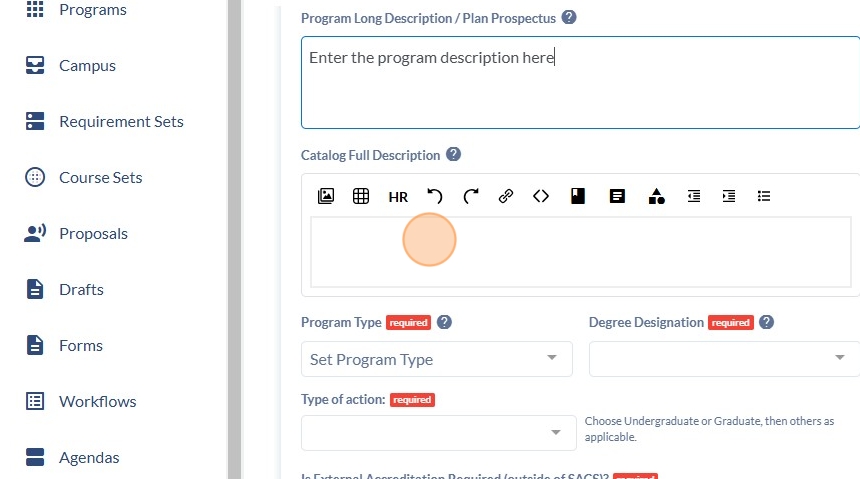
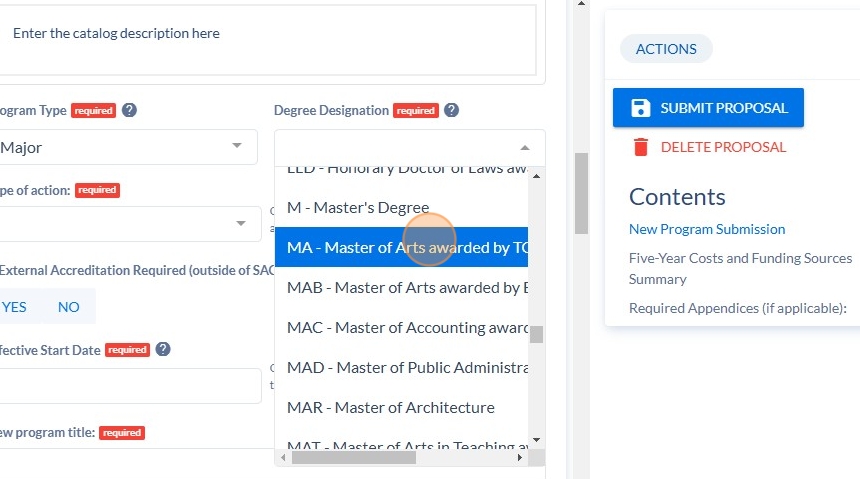
17. Click into "Program Type".
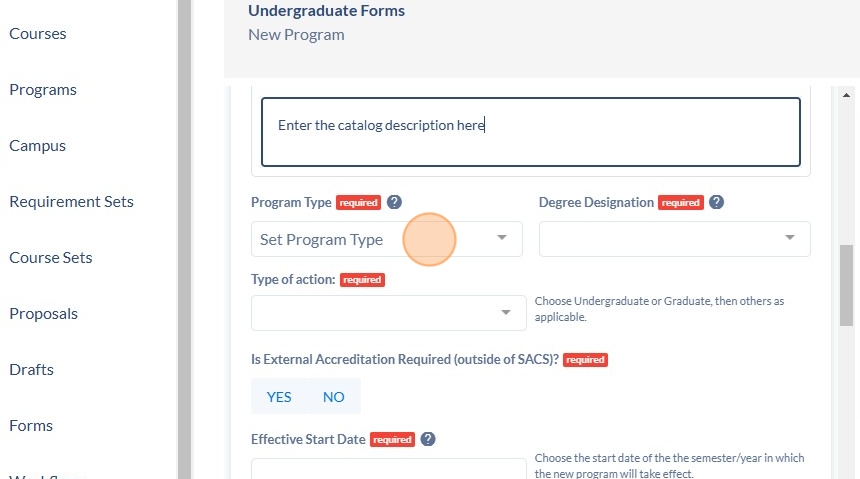
18. Click on the appropriate program type.

19. Click into "Degree Designation".

20. Enter the appropriate degree type.
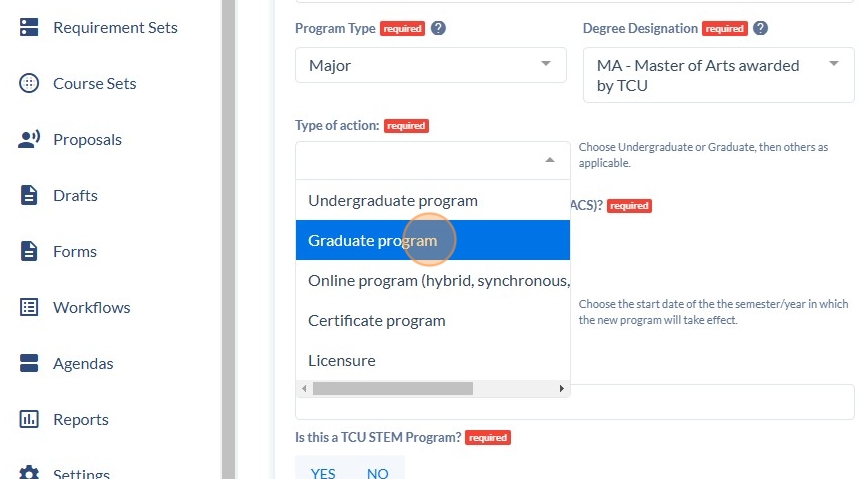
21. Click into "Type of Action" and select Undergraduate or Graduate.
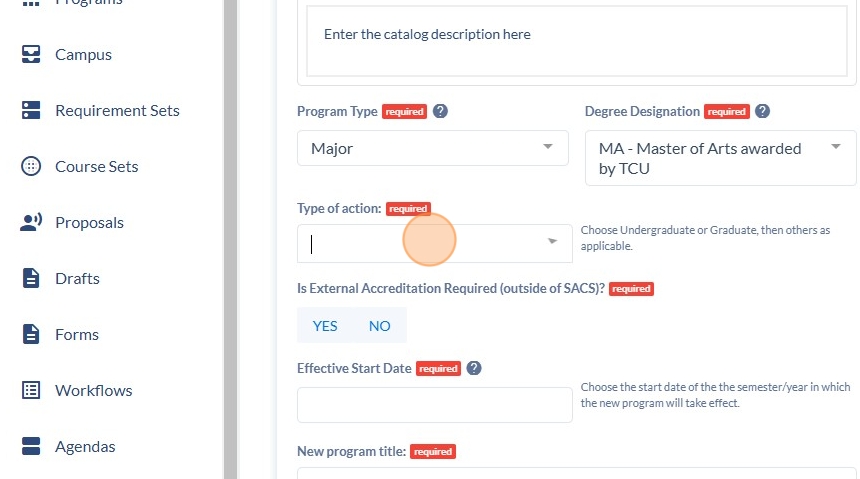
22. Click on the appropriate program.
23. Select whether additonal accredidation is required.

24. Click into the "Effective Start Date" field and enter the appropriate start date.
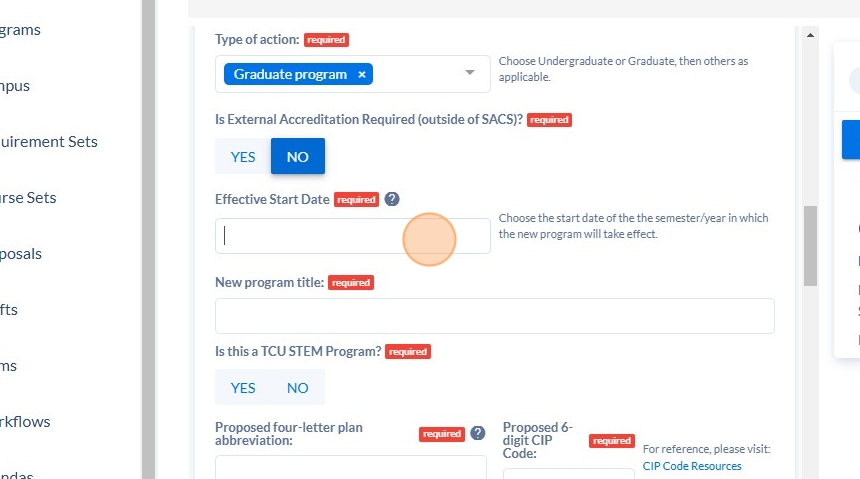
25. Click into the "New program title" field and enter the title of the program.

26. Select whether this is STEM program.

27. Click into the "Proposed four-letter plan abbreviation" field and enter the proposed plan code.
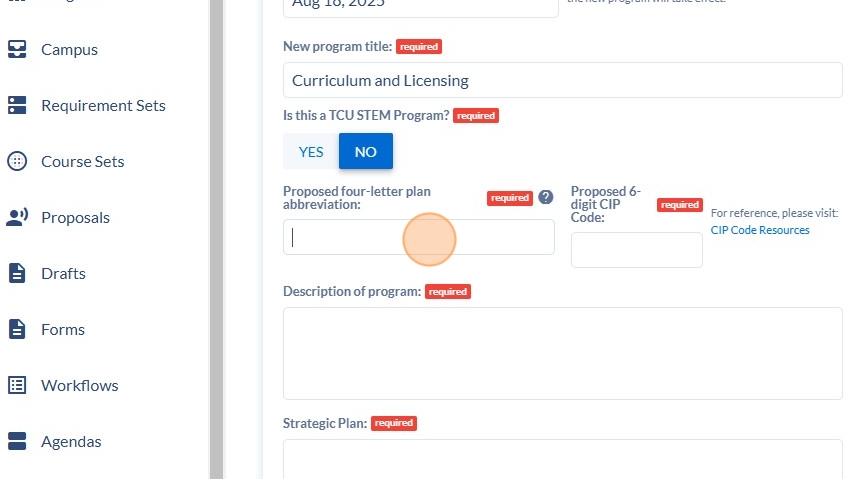
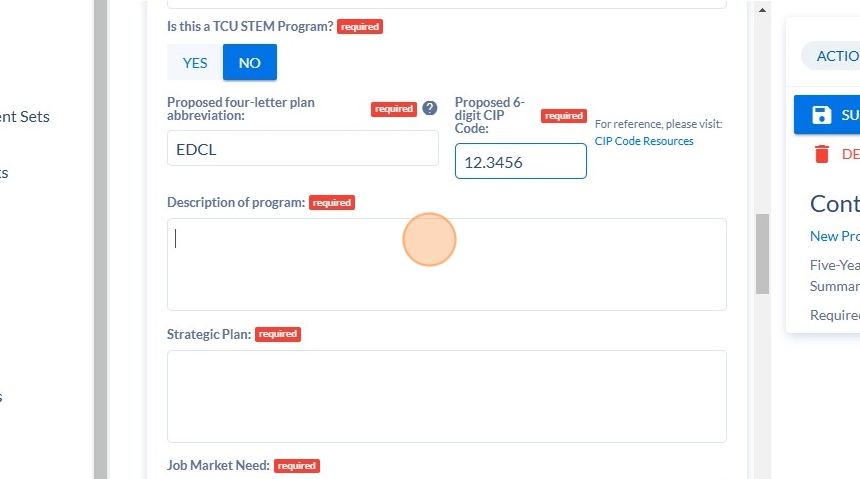
28. Click into the 'Proposed 6-digit CIP Code" field and enter the CIP code.
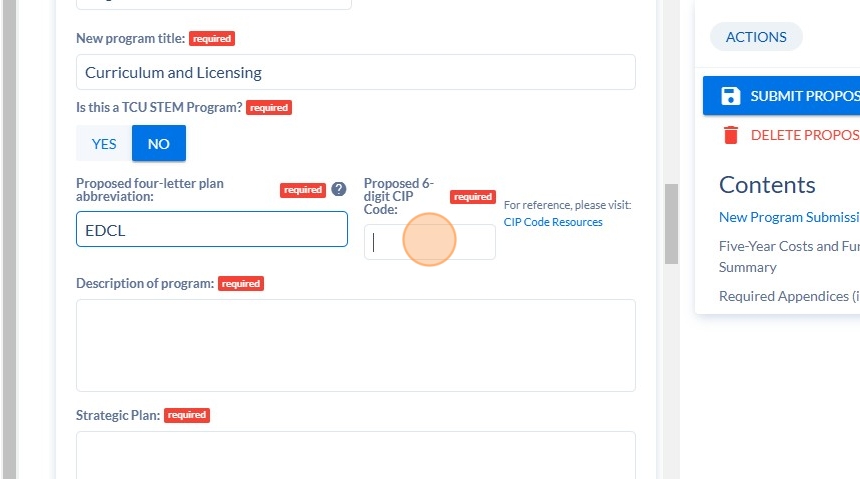
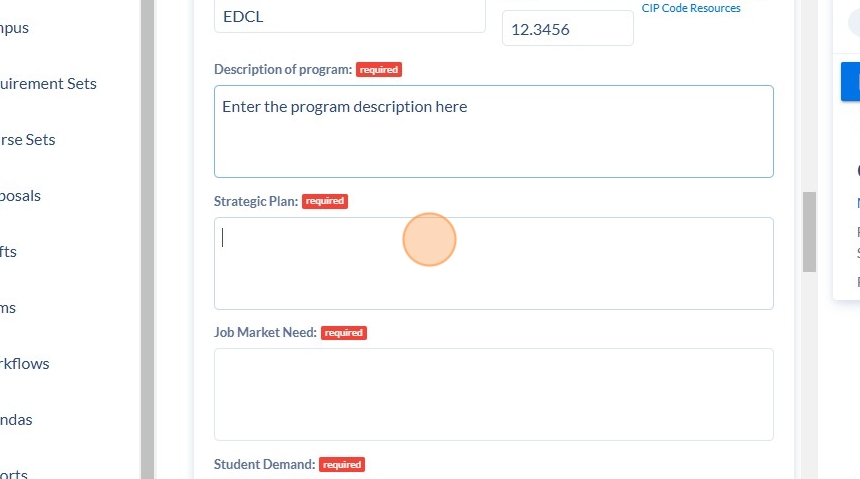
29. Click into the "Description of program" field and enter a short program description.
30. Click into the "Strategic Plan" field and describe how the program ties to the strategic plan.
31. Click into the "Job Market Need" field and provide the job market need for the program.

32. Click into the "Student Demand" field and describe student demand for the program.
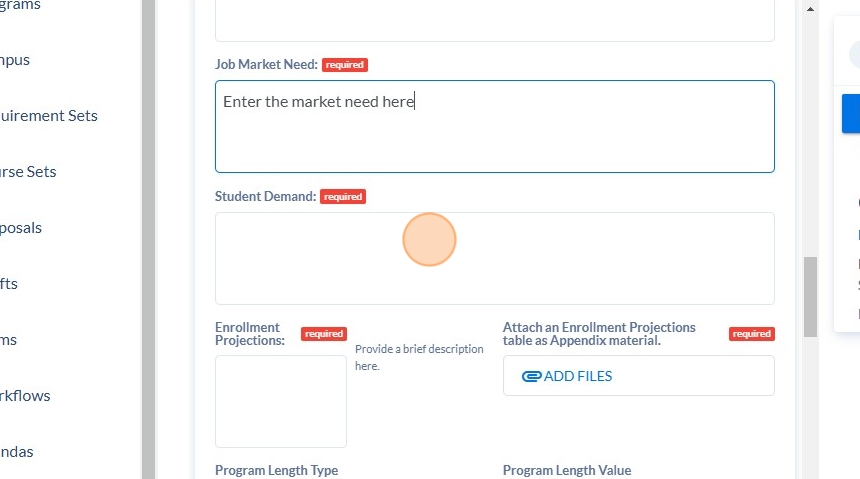
33. Click into the "Enrollment Projections" field and describe anticipated enrollment projections for the program.

34. Upload your enrollment projections file here.
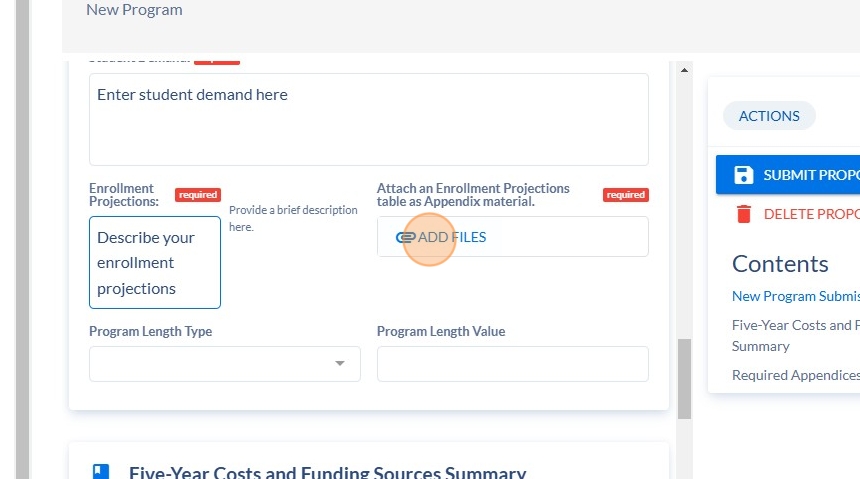
35. Select the program length type (month, days, etc.).

36. Click the appropriate designator.

37. Click into the "Program Length Value" and enter the length of the program.

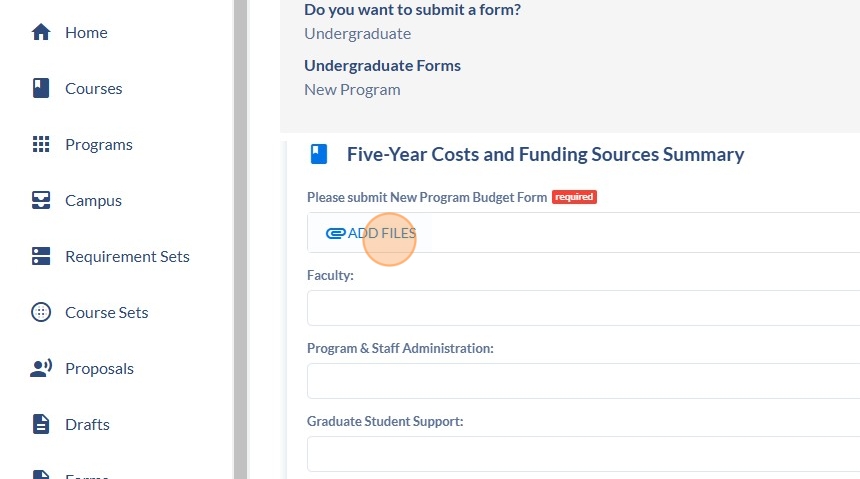
38. Submit your "New Program Budget Form" here.
39. Under "Required Appendices", upload your approved Permission to Plan/verification of approval of the Permission to Plan.
Course Scheduling
Into
Room Scheduling
Intro